Cultivated Creations: Blending Needle Felting and Hoop Embroidery to Grow Textile Art Inspired by Horticulture
Welcome back to Textile Topher, where the realm of textiles and tech merges to fuel your creativity and deepen your understanding of all things fibers and threads! Today, we’re diving into a brilliant fusion of two timeless crafts — needle felting and hoop embroidery — to create a stunning piece inspired by the wonderful world of horticulture. Specifically, I’ll be discussing a fabulous project that brings tiny, needle-felted wool carrots together with hoop-embroidered greens, ingeniously crafted by Olives and Bananas, a yarn shop based in Thunder Bay, Ontario.
The Ingenious Combination: Needle Felting and Hoop Embroidery
Imagine walking into a room and seeing a whimsical art piece that instantly sparks joy — textile carrots dangling from an embroidery hoop, accentuated with luscious green leaves meticulously stitched. This captivating creation effectively intertwines the tactile beauty of needle felting with the intricate precision of hoop embroidery. The resulting artwork isn’t just a feast for the eyes; it opens a door to numerous exciting possibilities for combining different textile crafts.
But before we delve into the nitty-gritty, let’s take a moment to appreciate the craftsmanship behind both forms of art:
Needle Felting
Needle felting involves using a barbed needle to sculpt and interlock fibers into a dense, cohesive structure. Originating from ancient practices, needle felting has gained modern popularity due to its relatively simple materials and processes, allowing crafters to produce three-dimensional textures and forms. The beauty of needle felting resides in its ability to create intricate, soft sculptures, making it a versatile technique for artistic expressions ranging from decorative pieces to functional items.

Key Terms in Needle Felting:
Roving: This is a long and narrow bundle of fiber. It is usually carded or combed and then twisted slightly, making it easier to handle.
Barbed Needle: A specialized needle with notches along its edges. These barbs catch the fibers and tangle them together, forming a firm structure.
Batt: A large sheet of prepared wool fibers, often used for larger projects or to create dense bases.
Hoop Embroidery
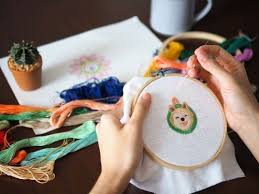
On the other hand, hoop embroidery offers a contrasting yet complementary skill set. This craft involves stretching fabric tautly within a circular hoop, then stitching various designs onto the fabric. Needle and thread dance over the surface, forming patterns, textures, and shapes. The precise, controlled movements of embroidery make it a valuable technique for adding detailed finishes and creating illustrative elements.
Crucial Hoop Embroidery Concepts:
Embroidery Hoop: A tool that keeps the fabric tight, providing consistent tension and making the embroidery process smoother.
Satin Stitch: A popular fill stitch that creates a smooth, satiny texture, perfect for leaves and other filled shapes.
French Knot: A single-thread knot often used to create small, raised dots, adding texture and detail to the project.
Bringing It All Together: The Art of Mixed Media in Textiles
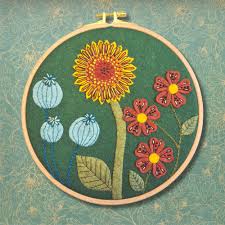
The joint effort of needle felting and hoop embroidery in this project brilliantly showcases the potential of mixed media in textiles. It provides not just an aesthetic appeal, but also an educational exhibition of how one can leverage multiple techniques to produce a cohesive piece of art. For instance, the three-dimensionality of the needle-felted wool carrots contrasts yet harmonizes with the flat yet textured embroidered greens, creating depth and visual interest.
Integrating multiple textile techniques can be analogized to cooking a complex dish: each ingredient (or technique) brings its unique flavor and texture, and when combined thoughtfully, they result in a culinary masterpiece. Similarly, blending different textile techniques can yield stunning, multifaceted creations that stand out both in form and function.
DIY: Crafting Your Own Needle-Felted Carrots with Hoop-Embroidered Greens
Does this crafty combination of fiber arts inspire you? Let’s break it down step by step so you can create your own version of these charming needle-felted carrots with hoop-embroidered greens.
Materials You’ll Need:
1. Needle Felting Materials:
– Wool roving in shades of orange and green
– Barbed felting needles
– Foam pad or felting mat
– Felting needle holder (optional but helpful)
2. Hoop Embroidery Materials:
– Embroidery hoop (6 to 8 inches recommended)
– Embroidery fabric (lightweight cotton works well)
– Embroidery needles
– Embroidery floss in green shades
– Water-soluble fabric pen or embroidery transfer paper
Step-by-Step Instructions:
Step 1: Crafting the Needle-Felted Carrots
1. Form the Base Layer:
– Take a small amount of orange wool roving. Turn it into a rough carrot shape by rolling and compressing it with your hands.
– Place the rough shape on your felting mat and begin to needle it with your barbed needle, focusing on forming the tapered carrot shape. Start from the thicker end and move towards the pointed end to create this taper.
2. Define the Structure:
– Continue needle-felting the carrot, adding layers as needed to build up the density and form. Be cautious of your fingers as the barbed needles are sharp.
– Occasionally roll the carrot between your palms to smoothen out any needle marks and ensure an even surface.
3. Adding Details:
– With green wool roving, create small tufts for the carrot tops. Felt these tufts onto the thicker end of the carrot, ensuring they are securely attached.
Step 2: Creating the Hoop-Embroidered Greens
1. Prepare the Hoop:
– Stretch your fabric tautly in the embroidery hoop. Make sure it’s uniformly tight to prevent puckering while you stitch.
2. Transfer the Design:
– Using a water-soluble fabric pen or transfer paper, draw or transfer the pattern of the carrot tops (greens) onto your fabric. You can freestyle the design or use a pre-made pattern.
3. Start Embroidering:
– Thread your embroidery needle with green floss. Opt for a few strands of floss (2-3) to provide enough bulk without overwhelming the design.
– Begin stitching using the chosen techniques, such as satin stitch for filled leaf sections or stem stitch for stem lines. Try incorporating various stitch techniques like fly stitch or lazy daisy to add texture and variety.
Step 3: Combining the Needle-Felted Carrots with Embroidered Greens
1. Assemble Your Project:
– After completing the embroidery, determine where you want to place your needle-felted carrots. You may wish to have them hanging from the top or sides of the hoop.
– Use a needle and thread to secure each needle-felted carrot to the embroidery fabric. Alternatively, you could use a strong fabric glue or attach them with small loops of thread so they dangle slightly.
2. Finishing Touches:
– Ensure all elements are securely in place. If necessary, reinforce with additional stitches or glue points.
– Trim any excess fabric if desired, leaving a neat edge around the hoop.
Expanding Your Fiber Art Horizon
This delightful integration project exemplifies the boundless possibilities of combining different fiber arts. Merging needle felting with hoop embroidery is just the start! Imagine elevating your home décor or upgrading a wardrobe item with a custom touch, blending various textile techniques to create unique, personalized art pieces.
Furthering your knowledge in specialized textile technologies can open even more doors. Exploring
smart textiles** and **technical textiles** could integrate technology into your projects, creating interactive or multifunctional art pieces. Picture combining soft electronics with your needle-felted creations to create light-up designs or embedding sensors in embroidered patches for health monitoring applications.
A Deeper Dive into Textile Innovations
Speaking of smart textiles, let’s briefly explore some intriguing terms and their potential applications in future crafting projects:
E-textiles: Short for electronic textiles, these materials have integrated electronic components such as wires, LEDs, sensors, and small electronic circuits. E-textiles are used in a variety of applications, including wearable tech, where they can provide functionalities like health monitoring, body temperature regulation, or illumination.
Conductive Threads: These are threads composed of conductive materials like silver or stainless steel. Used in conjunction with traditional sewing methods, these threads can create circuits within a fabric, facilitating the integration of electronic elements in textile projects. Imagine stitching a carrot that lights up when touched or changes color according to the room temperature!
Smart Fabric: A type of fabric that not only has traditional aesthetic and physical properties but also has been enhanced with technology. These fabrics can respond to environmental stimuli, such as temperature, humidity, or pressure. For example, a smart fabric could be incorporated into a hoop embroidery project to create dynamic, changing designs contingent on the surrounding environment.
Conclusion: Embrace the Endless Possibilities!
The needle-felted wool carrots paired with hoop embroidered greens from the talented Olives and Bananas yarn shop in Thunder Bay are more than just charming — they’re a testament to the power of combining traditional crafts to create something truly unique and inspired. Whether you’re an experienced fiber artist or a curious beginner, blending multiple textile techniques can elevate your projects, driving both your creativity and technical skill set.
So, hop to it! Gather your materials, clear a workspace, and begin experimenting with the delightful abundance of textile arts at your fingertips. And remember, in the world of textiles and tech, the only limit is your imagination.
Stay crafty and innovative, textile enthusiasts!
Yours in fibers and threads,
Textile Topher**
Keywords: Needle Felting, Hoop Embroidery, Textile Techniques, (Post number: 142), Olives and Bananas, Mixed Media


